


Before spending on a GTA 6 vehicle, separate three costs: restoring its condition, changing its appearance, and improving how it drives. A respray is easy to recognize. A claimed handling improvement needs stronger evidence, such as an explicit part description or a repeatable driving comparison.
For players browsing GTA 6 Accounts advertised around vehicle collections or customization progress, a garage screenshot provides limited information. Check which vehicles are included, what modifications are documented, and whether the advertised progress matches the relevant platform and game mode.
The buying advice below separates documented customization from categories that still need vehicle-specific verification. It does not assume that GTA 5 upgrade menus, prices, or handling effects carry over.
What Is Confirmed About Vehicle Customization?
Vehicle modification is an established GTA 6 feature. Rockstar’s edition information lists vehicle mod shops and a Ganado Retro Build, providing official confirmation of customization content. Those listings do not establish a universal upgrade catalog, identical options for every car, or performance figures for individual parts.
Published gameplay documentation also shows a Cosmetics menu with respray choices, liveries, decals, and plates. Paint types and available selections can differ between services. Treat the menu displayed for your current vehicle as the purchase reference rather than copying another car’s shopping list.
A complete parts-and-prices guide needs evidence for each entry. This guide therefore avoids universal dollar amounts, upgrade percentages, and claims about hidden handling bonuses.
Paint, Wheels, and Exterior Changes
Paint is the clearest place to separate visual preference from driving performance. Compare the color and finish on the actual vehicle preview before purchasing. Check the roof, lower panels, and trim: a finish that suits one body shape may obscure details on another.
Liveries and decals deserve the same inspection. Look for graphics crossing panel gaps or covering features you wanted to keep visible. Before replacing an existing design, check whether the menu offers a way to select it again.
Wheel and body-part decisions require more caution. A visibly different rim, spoiler, or ride height does not establish a particular grip or speed benefit. Only assess parts actually offered for the selected vehicle.
| Modification or service | What to inspect | How to budget it |
| Paint or finish | Color coverage and surface appearance | Appearance spending |
| Livery, decal, or plate | Design, placement, and replacement options | Appearance spending unless another effect is documented |
| Wheel option, if available | Fitment, description, and listed effects | Do not assign a grip benefit from appearance |
| Body component, if available | Compatibility and any explicit handling effect | Assess the individual component |
| Engine restoration | Whether it restores the stock engine | Maintenance, separate from tuning |
| Performance part, if available | Stated function and comparable driving results | Driving improvement only when supported |
Engine Work, Brakes, and Suspension
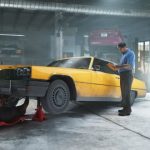
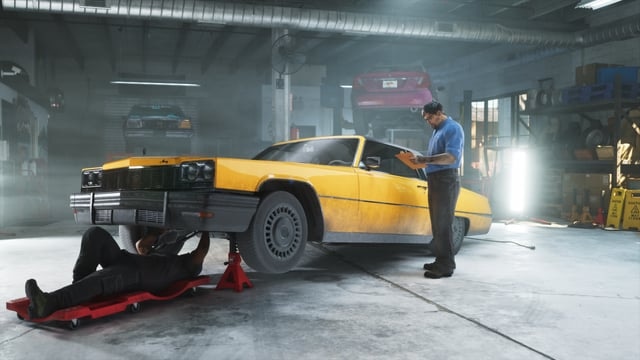
Restoration and upgrading are different purchases. Gameplay screenshots from the introductory repair sequence show a “Stock Engine (Restore)” selection. That supports engine restoration, but it does not establish a ladder of engine upgrades or a specific acceleration gain.
For any additional engine option, read what the game actually says it changes. Avoid treating a higher price, louder sound, or different label as proof of a faster car.
Apply the same standard to brakes and suspension. This guide does not present either as a universally available upgrade category. If your vehicle offers them, identify their stated effects before paying. Do not import GTA 5 suspension advice or assume that lowering a vehicle automatically improves cornering.
Test one change at a time. Use the same road segment, direction, starting point, and vehicle condition. Repeat the run when traffic interrupts it. Buying several parts together makes it harder to identify which purchase helped or introduced an unwanted behavior.
Check Compatibility Before Committing to a Build
Inspect the intended vehicle before buying it for a specific modification. A customized example shown in promotional material does not prove that another model supports the same parts.
Edition content also needs checking. Rockstar lists specific customization content among its edition offerings, so verify the requirement for the exact build you want before budgeting around it. A named bonus does not establish that every similar modification has the same access requirement.
Record the vehicle model and the part name when comparing builds. “Available on a sports car” is too broad to support a purchase decision.
Plan Around City, Highway, or Off-Road Use
For city driving, test short acceleration bursts, braking before junctions, and turning through traffic. Identify the maneuver that causes repeated mistakes. If the car already handles your usual route comfortably, expensive performance spending needs a clearer purpose.
On highways, compare acceleration over a repeatable stretch and control during lane changes. Leave enough room to brake safely during testing. A build that feels quick in a straight line still needs to remain manageable when traffic forces a correction.
For off-road use, test the intended route before selecting modifications. Include uneven ground and the transitions between paved and unpaved surfaces. Spend on terrain-related parts only where their availability and function are documented; an off-road appearance alone cannot establish a traction benefit.
These are testing priorities, not confirmed GTA 6 tuning recipes. They help identify a vehicle’s weaknesses without inventing parts or performance effects.
Budget Priorities Before You Purchase
Use a spending order that keeps appearance purchases from consuming money needed for the vehicle’s intended job:
- Confirm the vehicle fits the route. Test its standard behavior where possible.
- Check its condition and service quote. Separate restoration costs from optional modifications.
- Choose one documented driving improvement. Target a problem you can describe and retest.
- Set an appearance allowance. Price the complete visual package before buying individual pieces.
- Keep funds for later work. Avoid spending the entire balance before the first comparison drive.
Use the price shown at confirmation, including any applicable discount. Rockstar advertises a GTA+ discount at select businesses, including vehicle mod shops, but that should not be applied indiscriminately to every purchase estimate.
Before You Buy or Modify
Treat listings for GTA 6 Modded Accounts as separate from official vehicle customization. Account modification is not a workshop option, and claims about altered account progress do not establish which vehicle parts the game supports. Do not interpret seller promises as guarantees of safety, permanent access, or protection from enforcement.
Before paying, verify the exact vehicle, available parts, access requirements, restoration quote, and total selected cost. Check whether replacing an existing finish or component requires another purchase to reverse. Confirm how the game retains that vehicle and its modifications before investing heavily.
After purchasing, inspect the installed parts and repeat your comparison route. Use the game’s available save process when permitted, check that saving has completed, and verify the vehicle’s configuration when you next access it.